MINECRAFT BASICS / BUILD-ALONG TUTORIAL
How to build an automated furnace in Minecraft
Give your furnace a little help! Learn to craft the basics, then connect three hoppers and three chests to load fuel, feed in items, and collect the results. Start with one furnace. Add a second when you’re ready.
By Games For Kids Hub · Based on Rob’s video published May 9, 2023
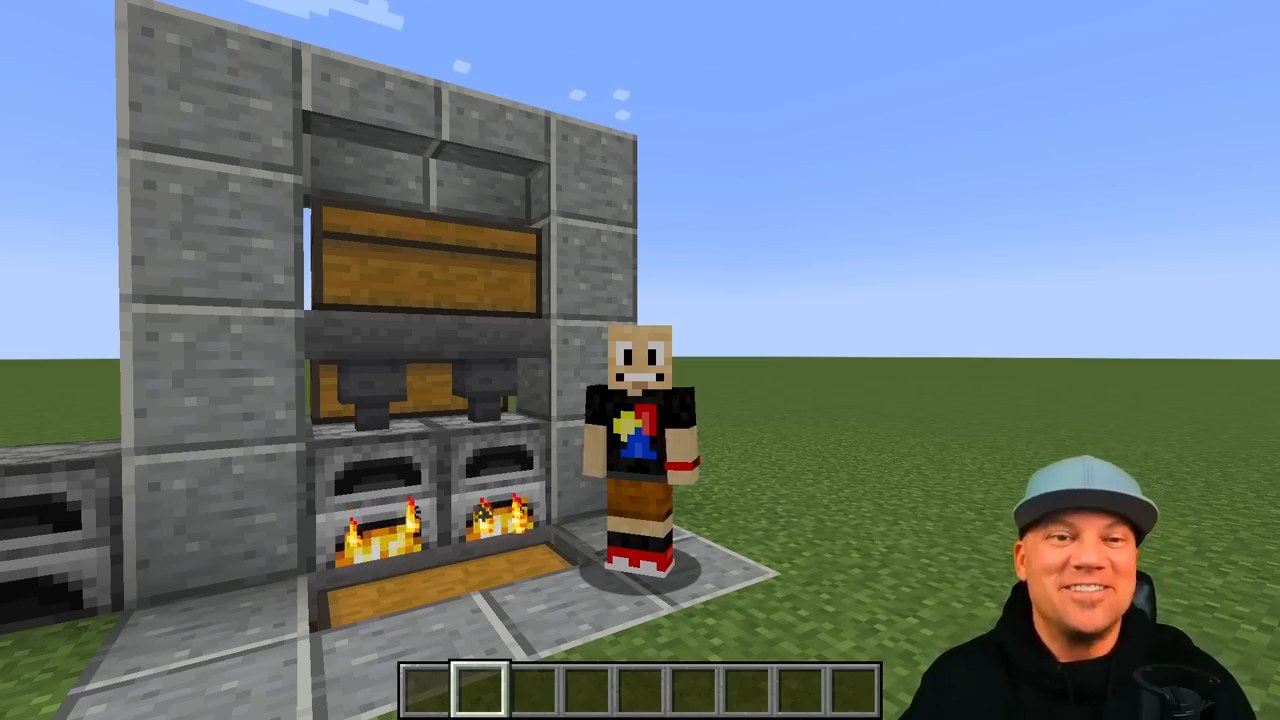
Watch and build with Rob
Watch the original video on YouTube. Pause whenever you need to. The chapter links below open the matching section on YouTube.
Gather your building kit
For the single-furnace machine, gather:
- 1 furnace
- 3 hoppers
- 3 chests to place in the build
- Fuel and a small test batch. Coal and raw iron are an easy pair to follow from the video. Rob also demonstrates raw cod and raw gold.
You’ll need a crafting table if you’re crafting the parts in Survival. Creative players can get the finished parts from their inventory.
Crafting from scratch? Count the extra chests.
The hopper recipe consumes a chest. For one machine, craft six chests in total: three stay as chests, and three become hoppers.
For these parts, you’ll need 48 planks, 15 iron ingots, and 8 cobblestone. This excludes your crafting table, fuel, test items, and decoration.
The completed two-furnace version uses twice those amounts: 96 planks, 30 iron ingots, and 16 cobblestone.
1. Craft the basics
Already have your parts? Skip to the build. Otherwise, open these quick recipe reminders.
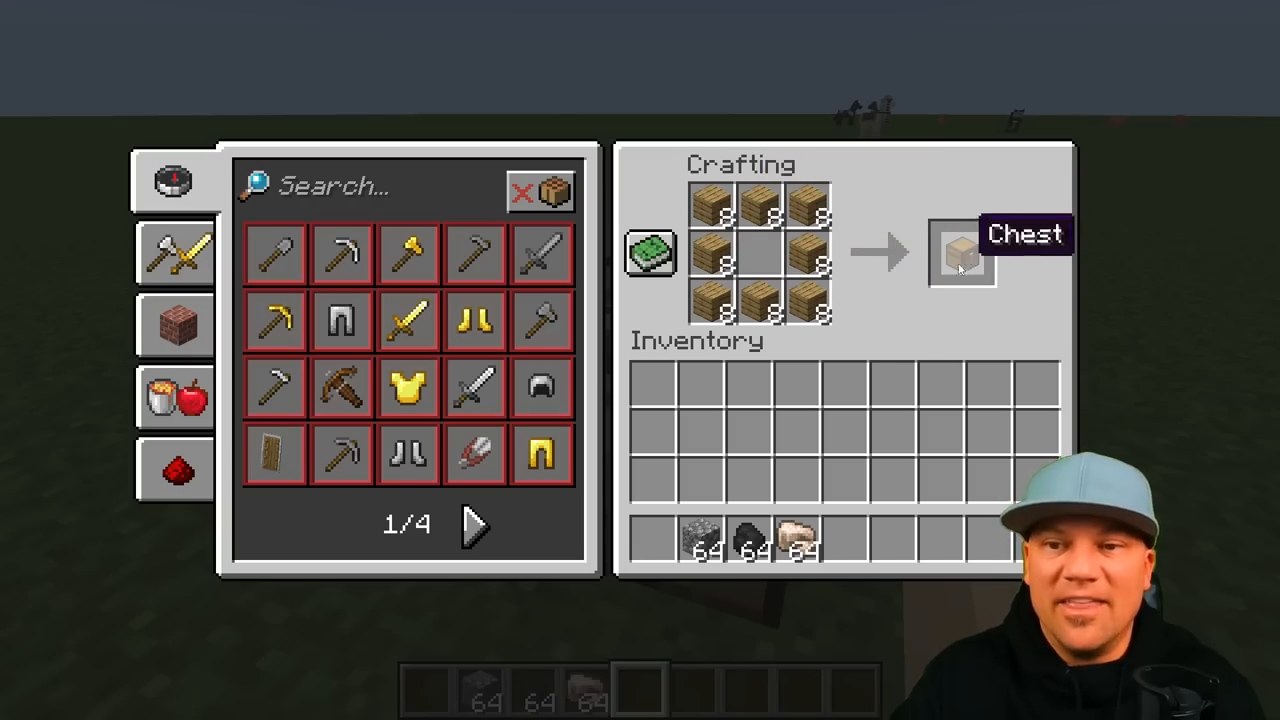
Chest: eight planks around an empty center
Fill the outside of the crafting table’s 3×3 grid with planks, leaving the middle empty. Two chest blocks placed together can make a double chest.
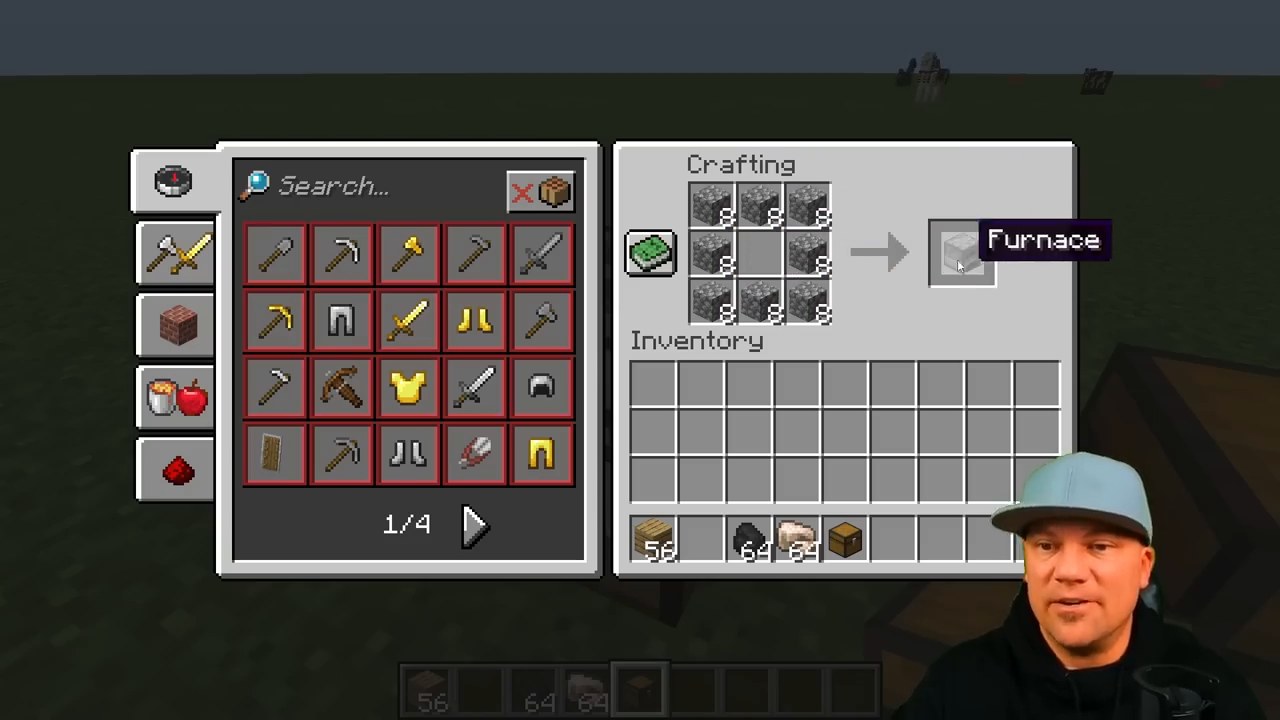
Furnace: eight cobblestone around an empty center
Use the same ring shape with cobblestone. In the furnace interface, the upper slot takes the item to cook or smelt, the lower slot takes fuel, and the right-hand slot holds the result.
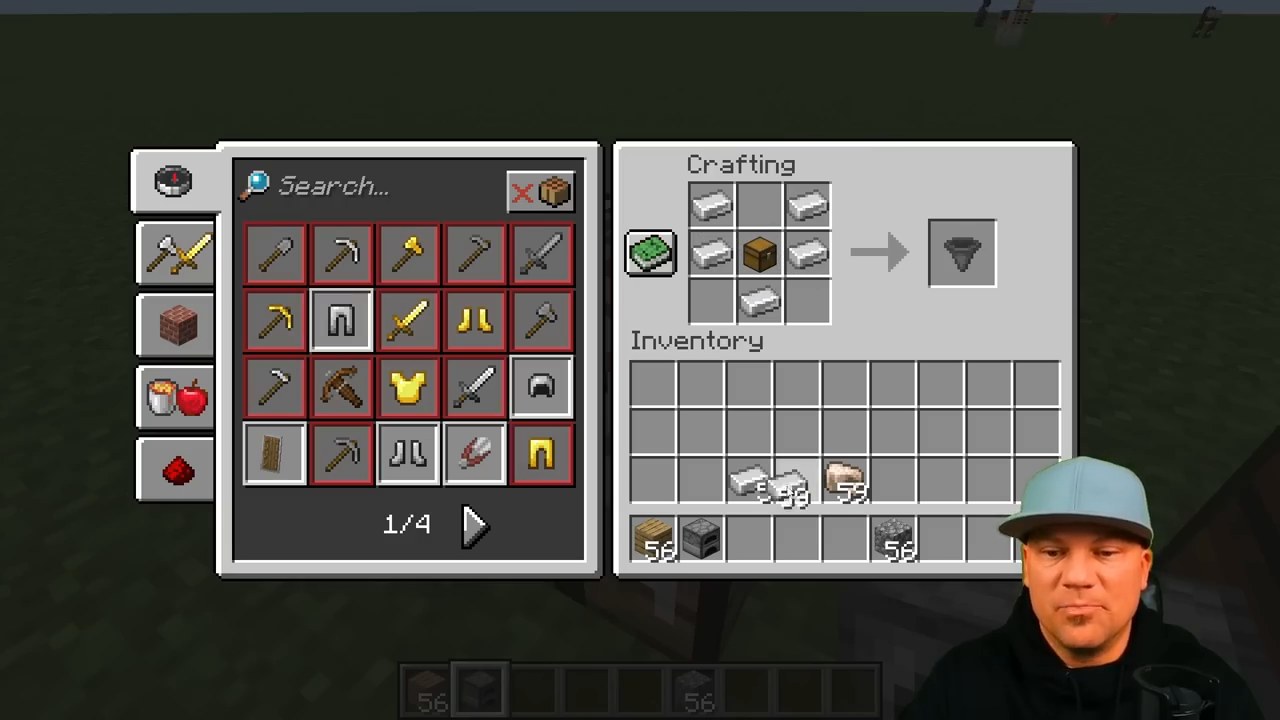
Hopper: one chest and five iron ingots
Put a chest in the middle of the 3×3 grid. Place iron ingots at the top-left, top-right, middle-left, middle-right, and bottom-middle. Make three hoppers for the single machine.
2. Give the furnace a fuel supply
Place the furnace with room behind it, above it, and underneath it. Rob starts at ground level and digs below it later.
- Stand behind the furnace.
- Crouch and place a hopper against the furnace’s back face. The hopper’s small outlet should point sideways into the furnace, not down into the ground.
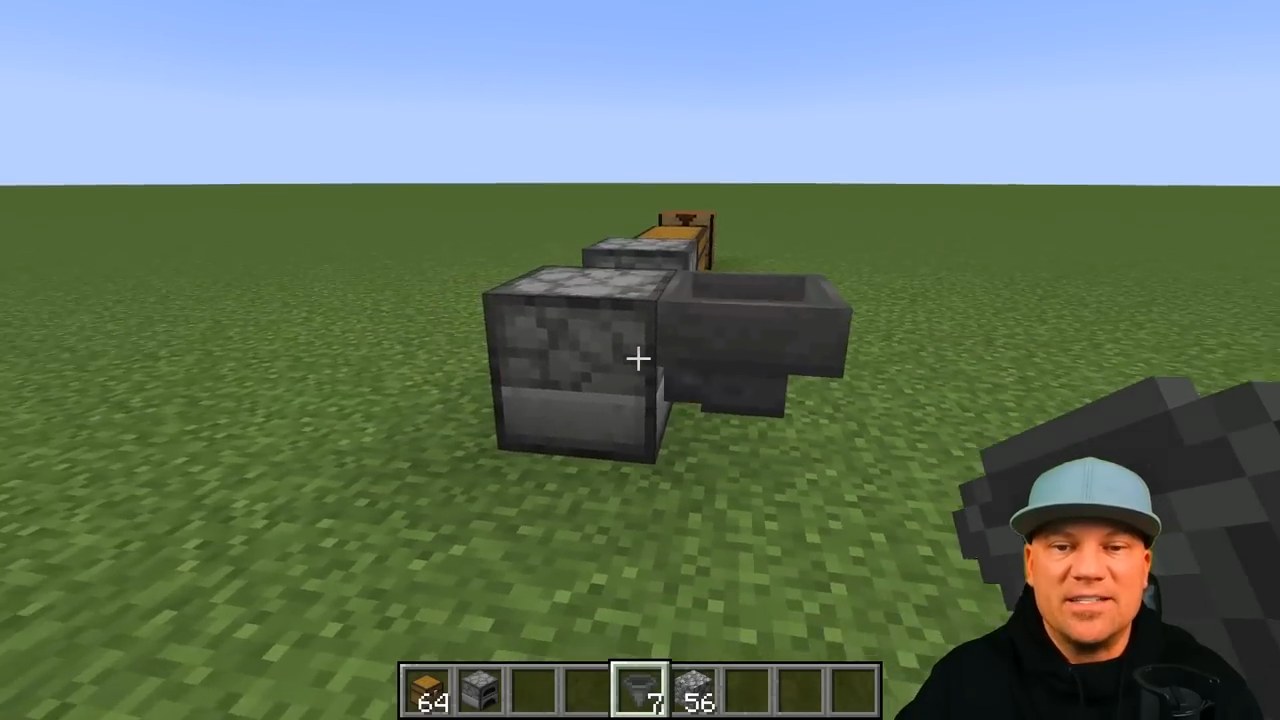
Crouch again and place a chest on top of that rear hopper. This is the fuel chest. Put coal in it, then open the furnace to check that coal is arriving in its fuel slot.
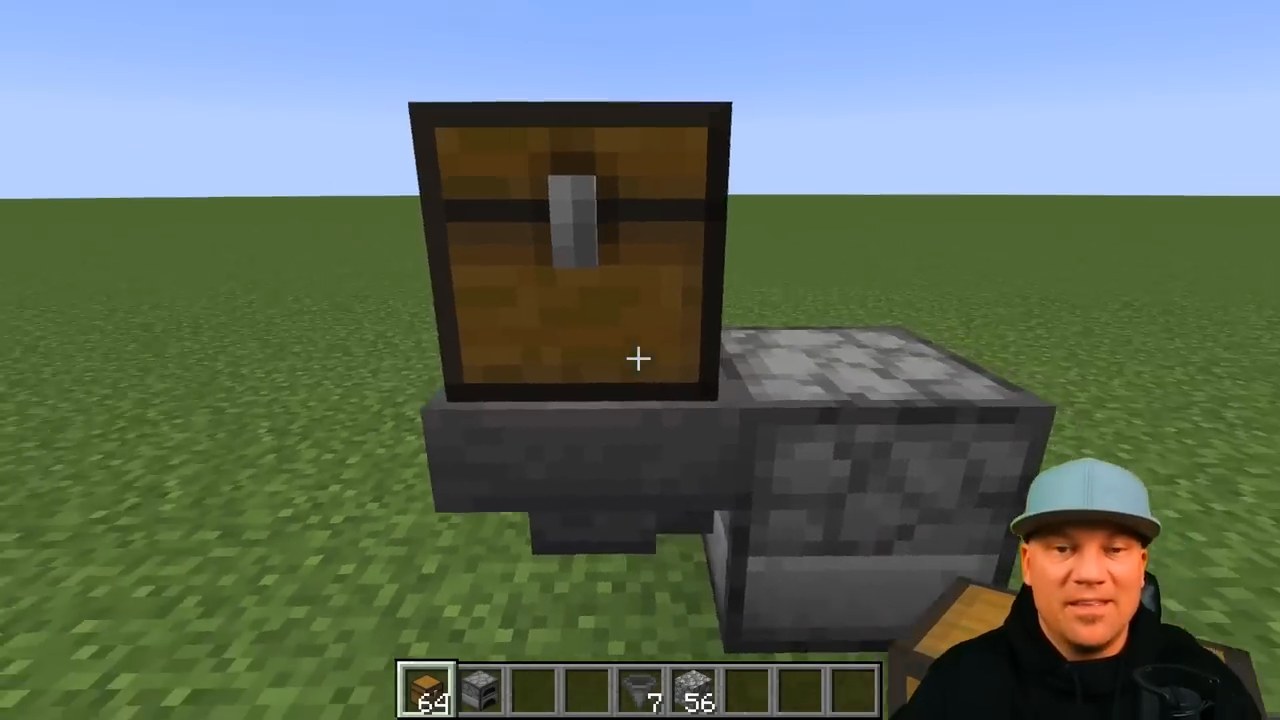
Rob briefly places an extra downward-pointing hopper to show the wrong direction, then removes it. That example is not a fourth hopper for your machine.
3. Add the input chest
Crouch and place your second hopper on the top face of the furnace, pointing down into it.
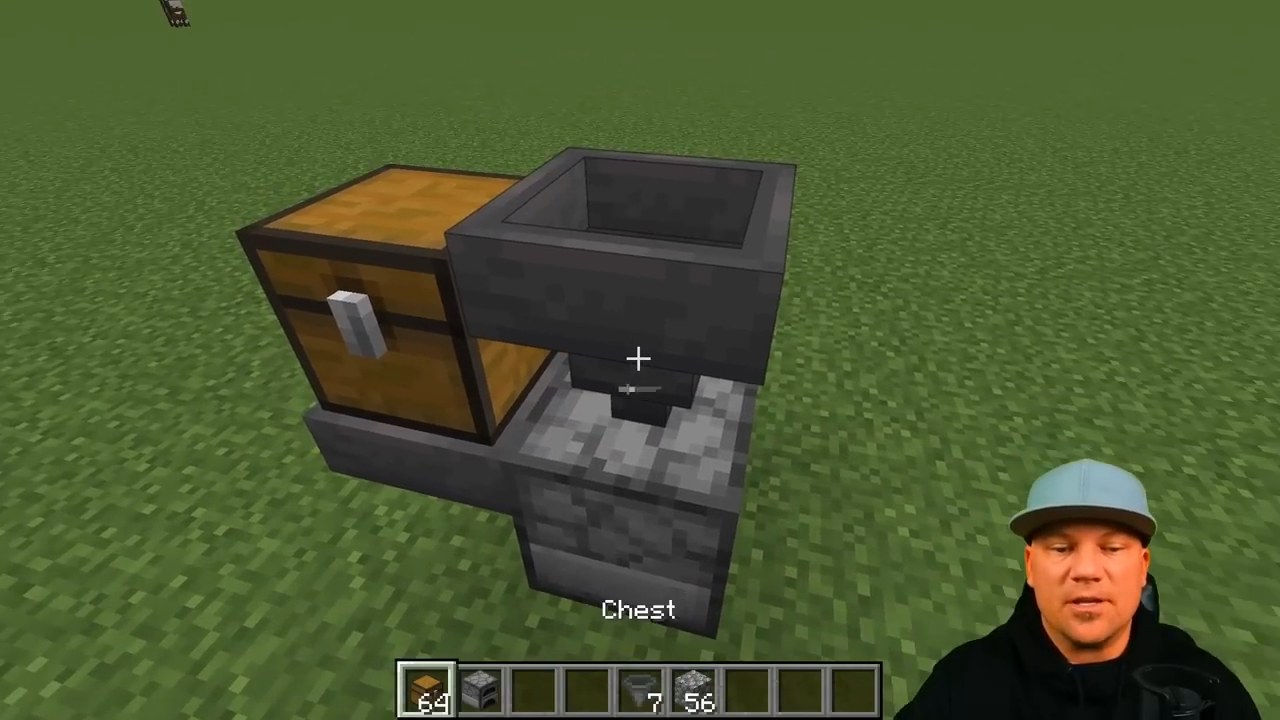
Now crouch and place a chest on top of that hopper. This is your input chest: items to cook or smelt go here. Keep fuel in the separate chest behind the furnace.
4. Catch the finished items
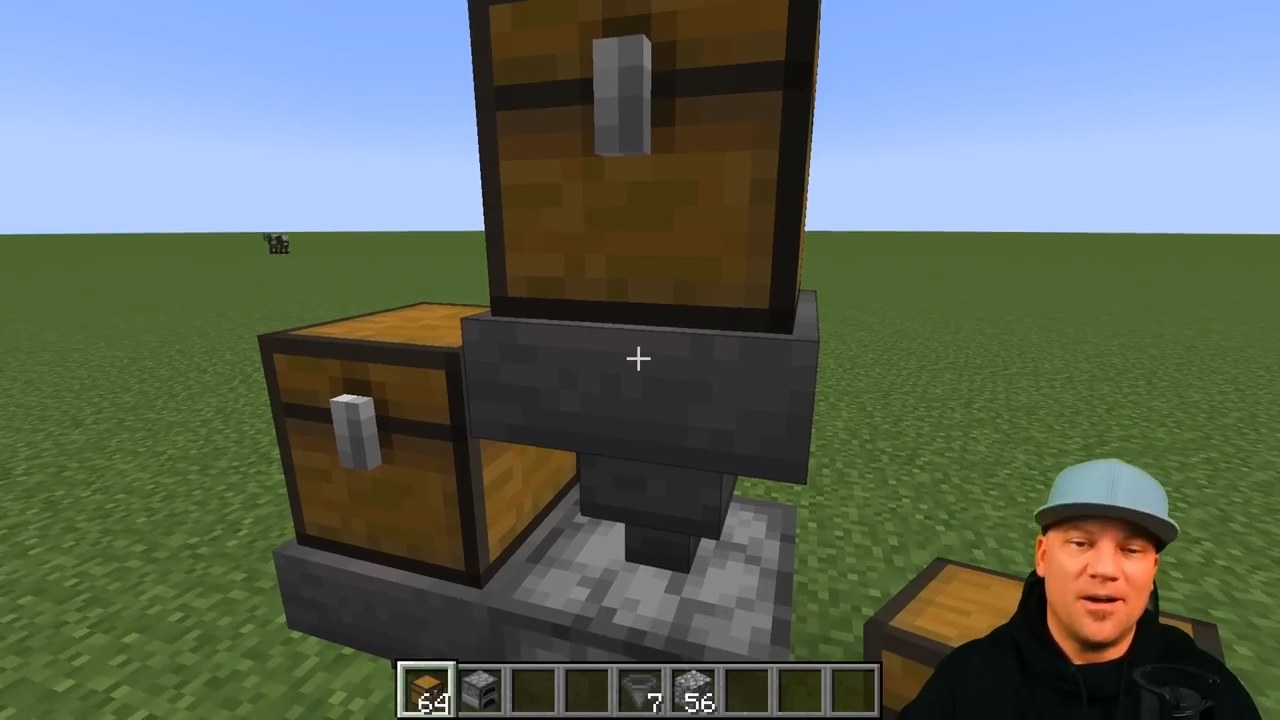
- Dig enough room beneath and in front of the furnace to reach its underside.
- Place the output chest in front, one block lower than the furnace.
- From underneath, crouch and place the third hopper against the chest. The hopper must sit directly below the furnace, with its outlet pointing horizontally into the output chest.
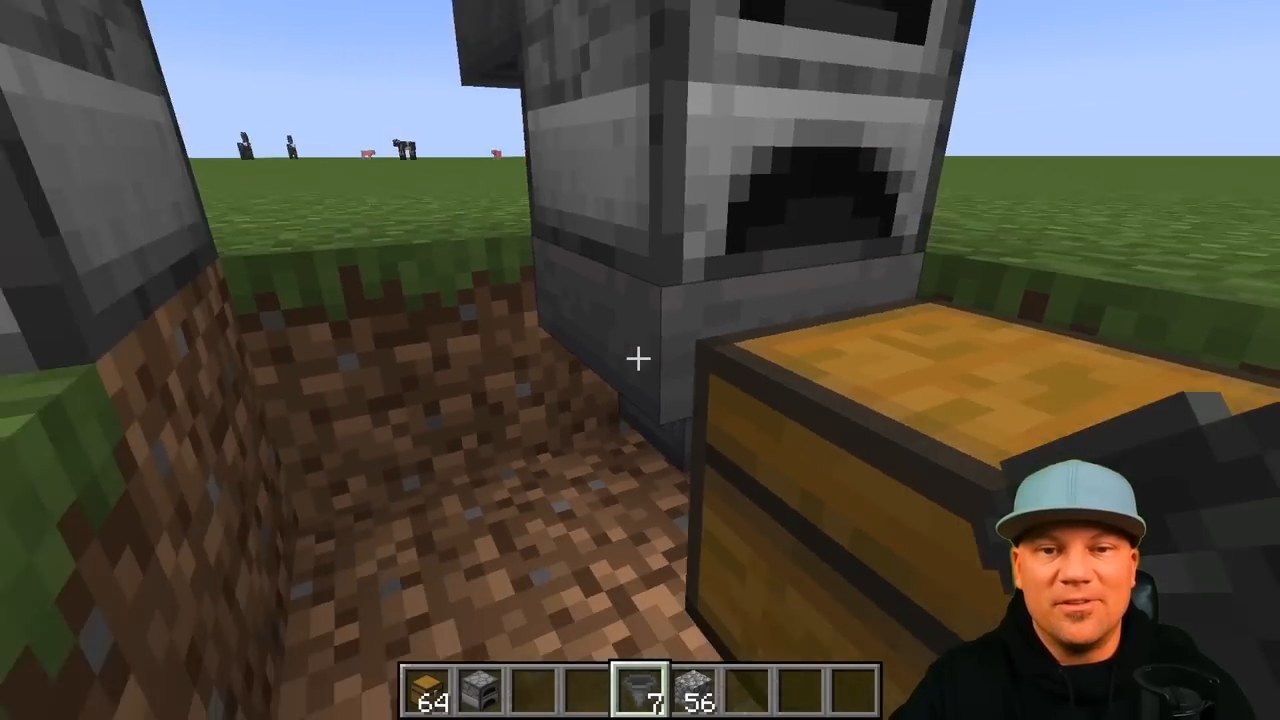
That gives each part a job: top = items, back = fuel, underneath = finished results.
5. Try a small batch
Put coal in the rear chest and a few raw iron items in the top chest. Watch for the furnace to light up. Then open the lower output chest and look for iron ingots.
The input chest queues the work; one furnace processes one item at a time. You can also try raw cod or raw gold, as Rob does in the video.
Pause and celebrate: you’ve connected the whole journey from input to storage. If something stays put, check the hopper directions before adding decoration.
6. Ready for two furnaces?
Add 1 more furnace, 3 more hoppers, and 3 more chest blocks. The finished build has 2 furnaces, 6 hoppers, and 3 double chests.
- Place the second furnace beside the first. Widen the lower output chest into a double chest, then add a hopper directly underneath the second furnace, pointing into that storage.
- Add a hopper behind the second furnace, pointing into its back. Extend the fuel chest into a double chest above the two rear hoppers.
- Add a downward-pointing hopper above the second furnace. Extend the upper input chest into a double chest above the two top hoppers.
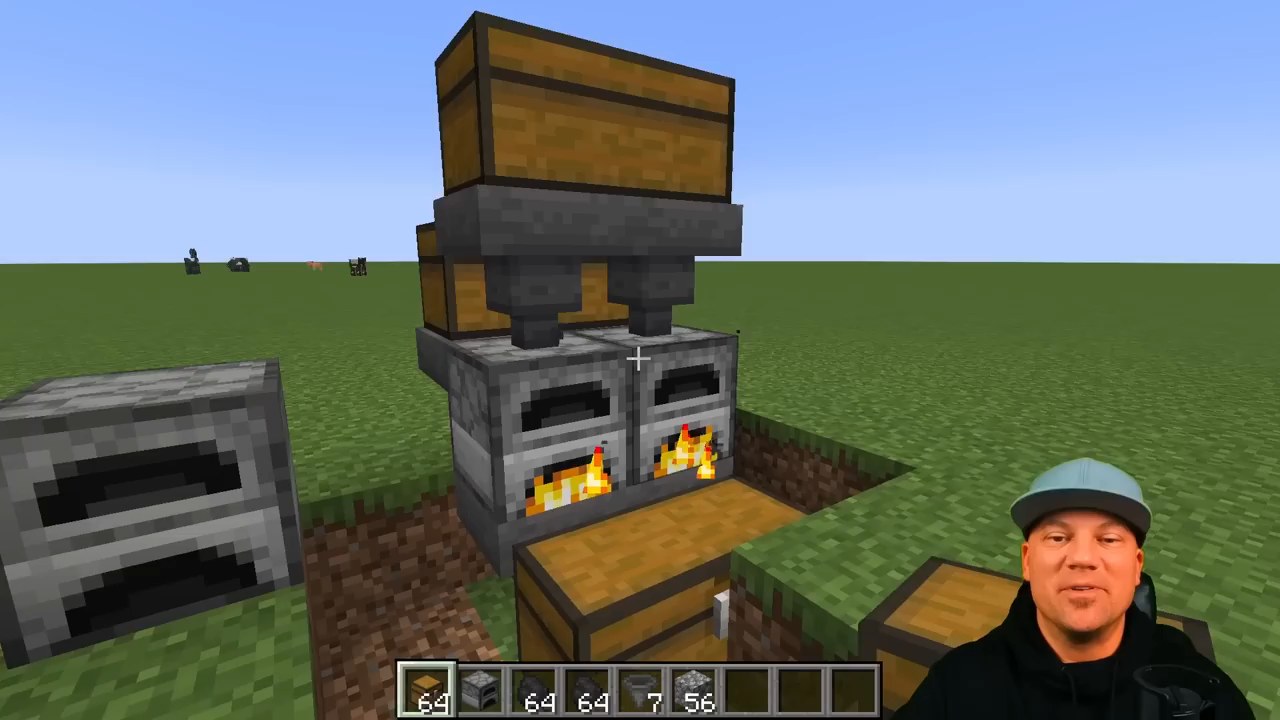
Refill the shared fuel and input chests and check both furnaces.
7. Make it feel like your world
Use Rob’s stone surround as inspiration, or choose blocks that match your base.
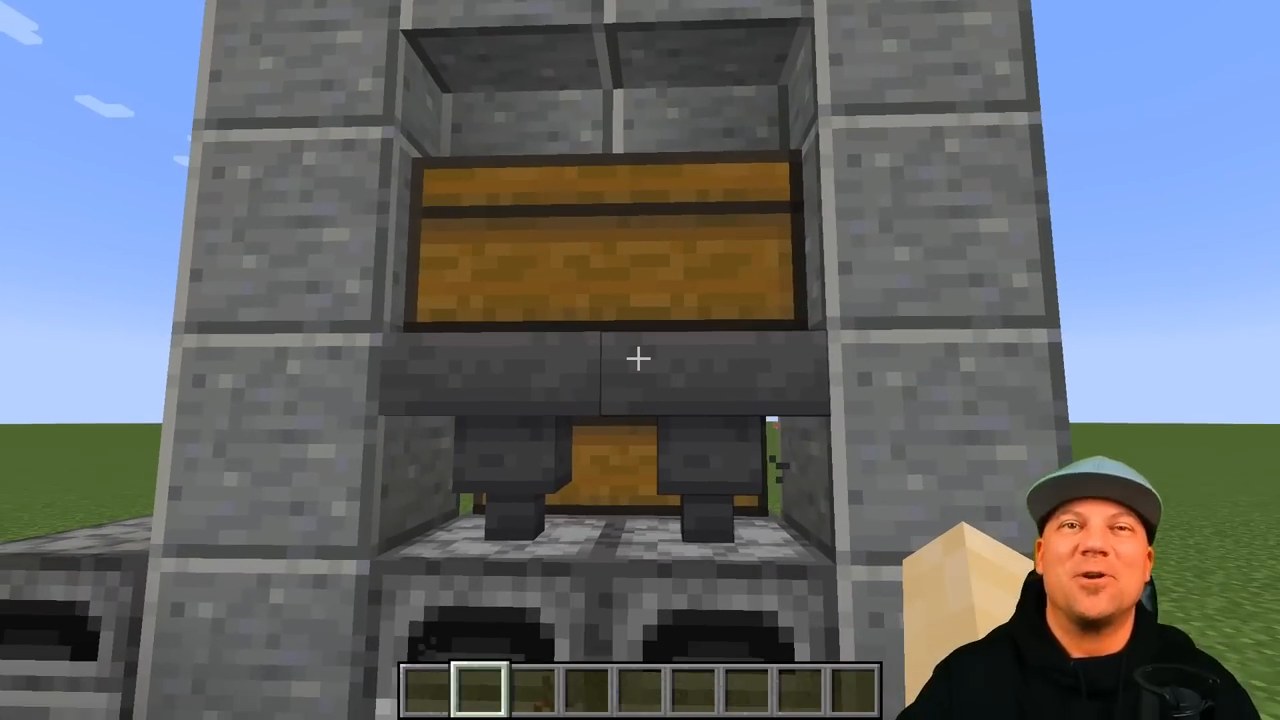
Rob explains that stairs above the upper chest let it open. He also reaches the rear fuel chest through the gap between the two front hoppers. Test your chest lids and access before calling the decoration finished.
Your family challenge: choose a color or style for the outside together. Keep the hopper connections unchanged, then show each other where the fuel, input, and finished items go.
Need a hand?
Placing a block opens the furnace or hopper
Crouch/sneak while placing the next part. This is the placement method Rob demonstrates.
Fuel isn’t reaching the furnace
Check that the rear hopper’s outlet points into the furnace and that the fuel chest sits directly above it. Confirm that you put fuel in that rear chest.
Items aren’t reaching the cooking slot
Check that the top hopper points down into the furnace and that the input chest is directly above it. Use a demonstrated item such as raw iron for your first check.
Finished items aren’t reaching storage
Check the hopper directly below the furnace. Its outlet should point into the lower front chest. Also check that your output chest has room.
Only one of the two furnaces is working
Compare the top, rear, and bottom connections in both columns. Check that each pair of chests really joined into a double chest. Try a small batch in each column before decorating.

